
Do you need a plumber to fit a new radiator? Our guide breaks down the complexities of radiator installation. Discover the benefits of professional plumbing expertise versus a DIY approach. Make informed decisions for a successful and hassle-free radiator replacement. Get insights from plumbing experts now!
Can you remove & replace radiators yourself?
So long as your new radiator has the same pipe centres as your old one, there's no reason why you can't replace it yourself. If this isn't the case, you will need to alter the position of your valves, which will require professional help from a qualified plumber.
How to Fit & Change a Radiator
Knowing how to fit and change a radiator will make upgrading your central heating system far easier. This will also allow you to get the most out of your radiators. Not only will newer units increase your efficiency, but they can also reduce your monthly energy bills.
Here we'll take you through the steps involved in replacing a radiator. We'll tell you what you'll need and the crucial stages along the way. Of course, you don't have to replace your radiators yourself. You can always call in a professional plumber instead.

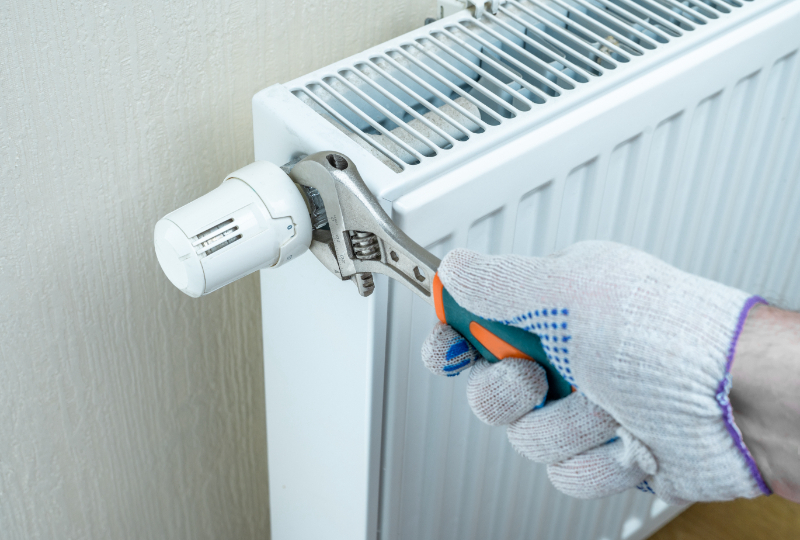
TRV & Lockshield
First things first, here are the tools and materials you'll need:
1. New radiator unit
2. A radiator fixing kit, which should include:
- 4 wall brackets
- Wall plugs
- Screws, bolts and washers
- Radiator-to-wall connectors
- 1 end cap
- 1 bleed cap
Ensure that the items in your radiator fix kit match those in the illustrations provided. Depending on what your walls are made from, you may need to use different plugs and screws.
In terms of tools, you'll need the following:
- Adjustable wrenches
- Drip tray
- Radiator bleed key or a flat-head screwdriver
- Cup or small container for bleeding the radiator
- Bucket
- Pipe cable
- Digital detector for drilling
- Pipe cable
- Allen key
- Hammer drill
- Masonry drill bits that match the wall plugs
- Steel wool
- Cloths
- TRV
- Lockshield
Steps to replace radiators
There are many advantages to replacing your radiators, especially if your existing ones are particularly old. Older radiators won't work as efficiently as new ones and can leave cold spots in your home. Luckily, replacing your radiators is relatively straightforward.
Here we've provided you with the information you need. However, if you aren't confident that you can do this, it's best to rely on a professional plumber.
Before you begin
The first place to start is to inspect your walls. Since you'll be screwing your new radiator onto your walls, you'll want to ensure they are strong enough to handle it.
f there are any cracks or crumbling bits of plaster, you'll need to fix these first. You also need to determine how your walls are constructed. For example, they might be solid masonry, bricks and mortar or hollow plasterboard or drywall.
Naturally, a solid brick wall will be better suited to holding a radiator, meaning you can choose from a wider selection of units.
If your walls are very strong, you can choose any size or style of radiator you want. So long as you have the right fixings and tools, you can attach large radiators to any part of a wall that's strong enough.
Alternatively, hollow plasterboard may limit your options. If your walls are made from plasterboard, you'll need to find the joists that the boards are attached to. These are vertical bits of timber behind the board which you can find with the digital stud detector.
These studs will be the strongest part of your plaster wall, and the ideal location to attach your radiator. Depending on where your joists are located, this might limit your options regarding the size and shape of your radiators. For example, if can fix an appropriate support bracket onto the studs, you won't need a wall plug. You'll just need to use the right kind of screw to attach the bracket.
How to remove & replace your radiator
Step One
Choose a new radiator with the same pipe centres as your old one. Again, if this isn't possible, you'll need to get a plumber to change the position of your valves.
Step Two
Once you've purchased a radiator with identical pipe centres, isolate the old radiator by turning off the valves on either side of it. Different units will have different valves. For those with manual valves, turn them clockwise until you can't turn them anymore. For thermostatic valves, turn them to the "zero" or "off" position.
If you have a lockshield valve, remove the plastic cover and turn the shaft clockwise with a spanner. Ensure you count the number of turns it takes to turn this valve off. This will tell you how to reset your new radiator to the same flow rate once you've installed it and need to re-open the valve.
Step Three
Put your drip tray underneath the valves to catch the water as you drain the radiator. Once both valves are turned off, loosen the swivel nuts connecting them to the radiator with your adjustable spanner. Of course, you'll need to do this one at a time for both the valves.
Also, it may help to have a second spanner or pipe wrench. You can use this second tool to hold onto the valve while you loosen the nuts. Otherwise, you risk turning the valve itself and buckling your central heating pipework.
Step Four
Next, you need to bleed your radiator. Open the bleed valve at the top corner of your radiator and loosen the cap nut with your radiator key or a screwdriver. Once your drip tray is nearly full, close the swivel nut near the valve and empty the tray into your bucket. Have your cloth handy to clean up any spillages.
You repeat this process until all the water is drained from the radiator. You can then lift the radiator out of its brackets and tilt it to get the last of the water out. An extra pair of hands might help at this stage. You can stuff some cloth into the outlet to prevent dirty water from leaking out while you put the radiator to one side.
Step Five
In most cases, the old brackets won't be compatible with your new radiator. So, next, you'll need to take these out of the wall and fill the gaps left by the previous screw holes.
Step Six
Before drilling new holes into your wall, ensure you know what's behind it. Use your digital detector to work out where any pipes, studs or electricity cables are and avoid them at all costs. Just pass the detector over the wall and mark the areas to avoid.
Step Seven
Screw your new brackets to the wall and attach your new radiator.
Step Eight
Shut off the bleed valve and reconnect your water pipes and bleed valves at the bottom of the new radiator before switching your water supply back on.
Bleeding your radiator
To bleed your radiator, you'll need:
A dust sheet
Radiator key
Drip tray or bucket
Cloth
The whole point of bleeding your radiator is to remove air from your central heating system. Perform the following steps to do this:
Step One
Put your dust sheet underneath your radiator and use your key or flat-head screwdriver to turn the bleed valve anti-clockwise. After a quarter or half a turn, the valve will open. Ensure you don't unscrew the valve any more than a complete turn.
Step Two
With the valve open, you'll notice a hissing noise as the trapped air escapes. At this point, watch carefully for the first signs of any water escaping. Having your bucket and cloth ready to clean any spillages will be prudent at this point. As soon as you notice water escaping, close the bleed valve, being careful not to overtighten the bolt.
Do you require radiator fitting services in Leicestershire? We offer services to both domestic and commercial customers Uppingham, Oakham, Stamford, Peterborough and Rutland. Our charges are highly competitive and realistic. If you are experiencing problems with your central heating - Please contact us.